Sometimes finding the source of a water leak in a vehicle is difficult and time consuming. Diagnosing a water leak can be made easier by first conducting an interview to ask the customer some questions, and then following up with some simple good practice procedures.
Questions to ask your customer should include:
- Under what conditions does the leak occur?
- Was the vehicle parked or moving?
- If it was parked, was it on an incline?
- Which way is it leaning?
- Does it happen when it’s raining or while washing the car?
- Was the vehicle taken to a car wash, vs hand-wash or a machine car wash?
- was the vehicle taken to a new car wash for the first time, (varying water jets/pressure)?
- If it is moving, at what speed does the leak occur?
- Was there body work performed or after market accessories/features added to the vehicle?
- Are any accessories being used when the leak happens?
These types of questions are valuable in helping you to properly duplicate or discover the conditions and possible root cause contributing to a water leak. This information will help you find the source and fix it right the first time.
There is a simple, but effective four-step troubleshooting procedure that you can use that will give you the best chance of preventing comebacks:
1. Verify
2. Isolate
3. Repair
4. Recheck

Verify
Perhaps the most important part of this procedure is the very first one: Verify.
The customer interview can make or break your verification time. For you to have the best chance of success, your service advisor needs to relay an accurate description of the customer comments.
Isolate
THE DRY METHOD:
- If your customer has an idea of where the water is leaking into the car;
- Check the location for evidence such as water marks, stains, or even tell-tale signs of rust.
- Check for air leaking in or out of the cabin:
- Noises caused by air leaking into the cabin are usually the result of damaged window seals or loose or broken body panel parts.
- These air leak conditions will often create a constant pitch and may also be telltale locations indicating water leaks.
Ultrasonic Leak Detector
An ultrasonic leak detector is a great tool for helping to pinpoint windshield leaks without having to water soak the car.
Ultrasonic, as the name implies, is sound above the detection range of the human ear.
The ultrasonic leak detector tool is capable of hearing pressures and vacuum leaks in an ultrasonic range. It consists of a highly sensitive microphone device, headphones, and a transmitter that can be used to detect a window seal leak opening or even an urethane skip along the windshield glass.
During operation it is largely unaffected by background noise so it greatly reduces other ambient noise from adjacent work bays using advanced filtering technology. The leak detector maintains the original sound characteristics along a path you’re checking until it detects an ultrasonic noise generated by a leak and translates it into a sound a technician can hear.
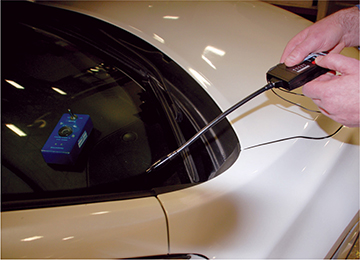
NOTE: Utilize a tech inside the vehicle to move the speaker along the suspected seam, while you remain outside following along with the receiver.
This method will allow you to maintain a constant delta distance between the source and receiver, which will help increase the sound emitted at a leak location.
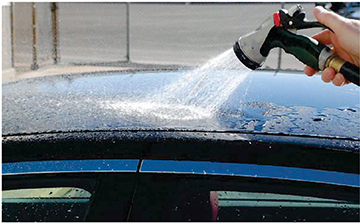
THE WET METHOD:
Isolating the point of water entry is sometimes the hardest step to fixing the leak. Usually this means being able to see where the water is entering the car, but that’s not always possible. It will take two technicians to perform the wet method diagnostic test because you’ll need someone in the car to actually see where the water is coming into the vehicle, not just where it is traveling along.
NOTE: When diagnosing a leak complaint, be sure to try and duplicate the conditions that occurred when the customer noticed the leak.
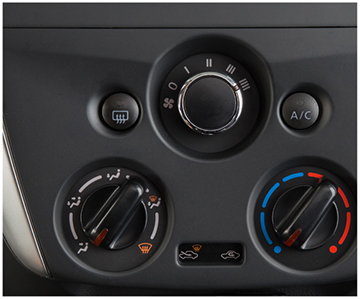
1. Turn the A/C blower OFF. You don’t want the passenger compartment “pressurized” for this test method.
- Technician one: Hose down the car with running water from a garden hose over the suspected leak area. When using a spray nozzle, it should be set to emit a lower pressure of water. A garden spray nozzle for watering plants works well. Or, spray a soap-and-water solution onto the suspected leak source area and watch to see if bubbles form.
- Technician two: Have another tech remain inside the vehicle to look for water leaking entry point. They may have to look around (using a good flashlight) while watching for leaks from inside the vehicle.
2. When water testing a vehicle, begin checking at the lowest possible leak location such as: from the bottom of the windshield, at the lowest point on a window, floor, or bottom of the door, and gradually work your way up to the roof.

NOTE: Keep in mind, it’s probably a waste of time checking higher up in the vehicle for additional leaks, until you’ve fixed the lower leak location(s) you’ve discovered.
ISOLATE (Continued)
Even if your service advisor has gathered plenty of detailed information during the customer interview. The customer statements may still require some additional thought on your part:
“The leak only happens when the interior fan is operated at higher fan speeds and while I’m driving in the rain.”
If the customer has described a condition like this, the issue becomes slightly more complicated.
Why would the windshield leak only when the blower fan is ON, when the vehicle is moving?
Answer: When the fan is turned ON, areas of low or negative pressure can be produced within the passenger compartment. When areas of high pressure are created outside the vehicle (as when the vehicle is moving), the pressure differential between the high pressure outside and the low pressure inside can cause air and rain outside the vehicle to be drawn inside.
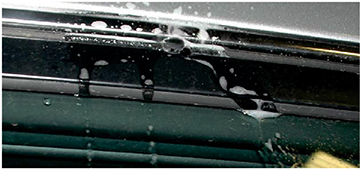
As you’re trying to determine the source of the leak, remember the old saying used by house roofers: “Think like a rain drop”. Because of gravity, water may actually be leaking down a ‘blind’ path from an entry point whose whereabouts may not readily be seen.
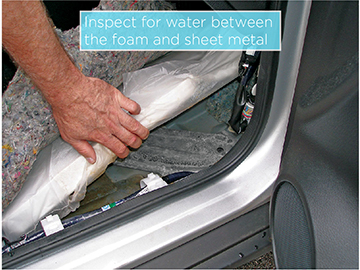
If the water leak is evidenced by a wet floor:
- Many of our vehicles have foam under the carpet, so make sure to pull the carpet back to inspect for water between the foam and sheet metal. If no water or dampness is found, leave the interior disassembled and perform water leak test at the cowl and wheel well areas, while technician two checks again for water leaks while you’re spraying water on the vehicle exterior.
- Check body seam seal areas behind dash panel finishers and on the floor.
- Remember, that water will trail along panels or body seams.
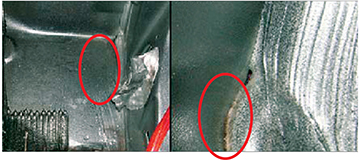
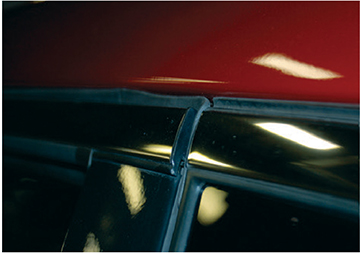
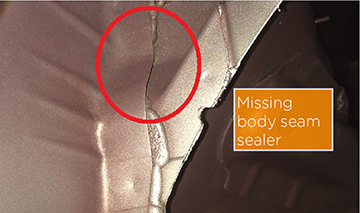
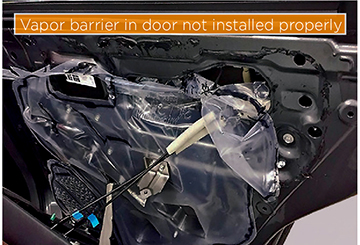
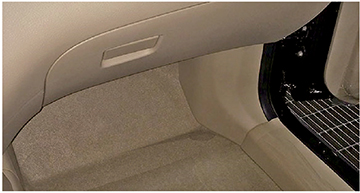
Visually check possible leak locations at:
- Body seams - missing sealer or voids
- Windshield glass or rear window glass- urethane skips
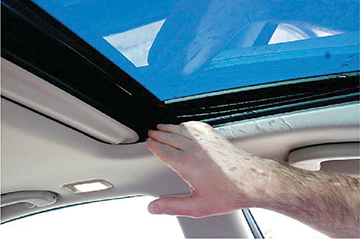
- Sunroof seals- disconnected, pinched, cracked or damaged drain hoses
- Pin holes in welds
- Torn or misplaced welts
- Poor door fits, or door glass weather-strips damage
- Vapor barrier in door misaligned or not installed properly
- Roof antenna not sealed properly
- Exterior molding clips
Repair
Once a water leak source is pinpointed, eliminating the leak is usually an obvious repair:
- Inspect the body sealer on the side that leaks and apply body sealer where needed. Apply 3M™ Fast ‘n Firm™ Seam Sealer—part number 08505 — or equivalent with a suitable applicator to all areas where body sealer is not seen (or if area is questionable) to seal water leaks.
- A wet carpet may be the result of the water leaking from the sunroof/headliner area, which may be related to the sunroof drain hoses. If the front RH or LH sunroof drain hose is found to be disconnected, kinked or pinched in the lower dash area, reconnect, or replace as necessary.
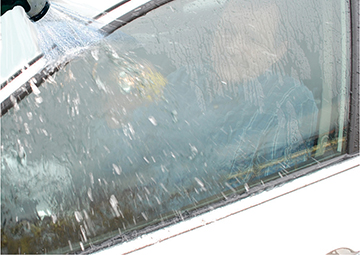
- Water leaks from the windshield
- Leaks from a windshield can possibly be repaired without removing and reinstalling glass.
- If water is leaking between the urethane adhesive material and body or glass, determine the extent of leakage.
- Try stopping a windshield leak by thoroughly cleaning and drying the area, then applying urethane adhesive to the leak point.
NOTE: Use a Genuine NISSAN Urethane Adhesive or equivalent and follow the instructions furnished with it.
Recheck the Repair
Confirm that the water leak is repaired by retesting for leaks. Try to create similar conditions as when the leak originally occurred.
Remember, conducting a proper customer interview and following simple good practice procedures can help you with diagnosing and eliminating leaks. Equipped with good information, some great deductive thinking on your part and the four-step troubleshooting procedure, you can save the day (and lots of time)! And what’s better than being able to make a repair that makes a customer happy!